技術メモ/
Next.jsでインポートするSVGファイルを最適化してCSSでスタイル設定できるようにする
やりたいこと
- Next.jsでSVGアイコンをファイルからインラインで出力したい。
- 線と塗りつぶしの色はアイコンごとに指定したい。
- イラレなどで作成したSVGファイルを最適化したい。
@svgr/webpackのインストール
npm install @svgr/webpackインストールしたら、next.config.jsを設定します。
next.config.js
const svgoConfig = require('./svgo.config');

module.exports = {
  webpack: (config, { isServer }) => {
    // https://react-svgr.com/docs/options/
    config.module.rules.push({
      test: /\.svg$/i,
      issuer: /\.[jt]sx?$/,
      loader: '@svgr/webpack',
      options: {
        prettier: false,
        icon: true,
        svgo: true,
        svgoConfig,
        titleProp: false
      }
    });
    return config;
  }
};
svgr/webpackをインストールすると、自動的にsvgoが使えるようになります。次にsvgo.configファイルを編集してsvgoの設定をするわけですが、その前にsvgoを使わない場合にどうなるか見てみます(options.svgo: falseに指定する)。
変換前
こんなSVGファイルを使うことを想定します。
squiare-outline.svg
<svg xmlns="http://www.w3.org/2000/svg" viewBox="0 0 512 512"><path d="M416 448H96a32.09 32.09 0 01-32-32V96a32.09 32.09 0 0132-32h320a32.09 32.09 0 0132 32v320a32.09 32.09 0 01-32 32z" fill="none" stroke="#000000" stroke-linecap="round" stroke-linejoin="round" stroke-width="32"/></svg>square-filled.svg
<svg xmlns="http://www.w3.org/2000/svg" viewBox="0 0 512 512"><path fill="#000000" stroke="#000000" d="M416 464H96a48.05 48.05 0 01-48-48V96a48.05 48.05 0 0148-48h320a48.05 48.05 0 0148 48v320a48.05 48.05 0 01-48 48z"/></svg>SVGファイルをimportしてページに出力します。
page.js
import Outline from "assets/square-outline.svg";
import Filled from "assets/square-filled.svg";

export default async function Index() {
  return (
    <div>
      <div>
        <Outline className="icon w-12 h-12 text-red-500" />
      </div>
      <div>
        <Filled className="icon w-12 h-12 text-blue-500" />
      </div>
    </div>
  );
}
global.css
.icon {
  fill: currentColor;
  stroke: currentColor;
}
結果
線も塗りつぶしも黒いまま
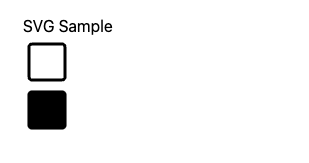
fillとstrokeにcurrentColorを指定しているので色がつくことを期待していますが、SVGファイルのpath要素に既にfillとstrokeが指定されているため、そちらが勝ってしまいます。
svgoの設定
svgo.config.js
// https://github.com/svg/svgo

/**
 * @type {import('svgo').Config}
 */

function addClassToElement(node, classNames) {
  const classList = new Set(
    node.attributes.class == null ? null : node.attributes.class.split(" ")
  );
  for (const className of classNames) {
    if (className != null) {
      classList.add(className);
    }
  }
  node.attributes.class = Array.from(classList).join(" ");
}

module.exports = {
  plugins: [
    {
      name: "preset-default",
    },
    {
      name: "convertStyleToAttrs",
    },
    {
      name: "cleanupListOfValues",
    },
    {
      name: "sortAttrs",
    },
    {
      name: "removeStyleElement",
    },
    {
      name: "removeScriptElement",
    },
    {
      name: "removeDimensions",
    },
    {
      name: "addFillNoneCss",
      fn: (root, params) => {
        return {
          element: {
            enter: (node) => {
              const attrNames = Object.keys(node.attributes);
              attrNames.forEach((name) => {
                const value = node.attributes[name];
                if (name === "fill") {
                  if (value === "none") {
                    addClassToElement(node, ["icon-fill-none"]);
                  }
                  delete node.attributes["fill"];
                }
              });
            },
          },
        };
      },
    },
    {
      name: "removeAttrs",
      params: {
        attrs: "(stroke)",
      },
    },
  ],
};
設定内容ですが、最適化の部分については詳しく解説しないので、設定の詳細は公式のドキュメントを見てください。デフォルトのプリセットを適用して、スタイルをattributeに変換、スタイルやスクリプト、width/heightを除去などをやっています。
https://svgo.dev/docs/preset-default/
そのあと、個別にスタイルが適用できるように、要素の中のstrokeとfill属性を除去しています。ただしfill: noneについては、塗りつぶされると困るので、icon-fill-noneというクラスを別にあてるようにしています。
global.css
.icon {
  fill: currentColor;
  stroke: currentColor;
}
.icon-fill-none {
  fill: none;
}
変換後
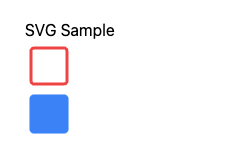
要素に指定した色が反映された。
最終更新: